


Let's Talk Techniques
Let's Talk Techniques
PART 4: How to Love Watercolor

Now that you know your setup, you can dose out transparency and understand how to use color. Today we’re going to take a deep dive into technique. Watercolor is all about the choreography between paint, paper and water. If you can master a few techniques, your watercolor options are limitless.
As a self-taught watercolorist, these are the techniques I use on the regular. Some I’ve given new names to, but feel free to let me know their correct names in the comment section below.
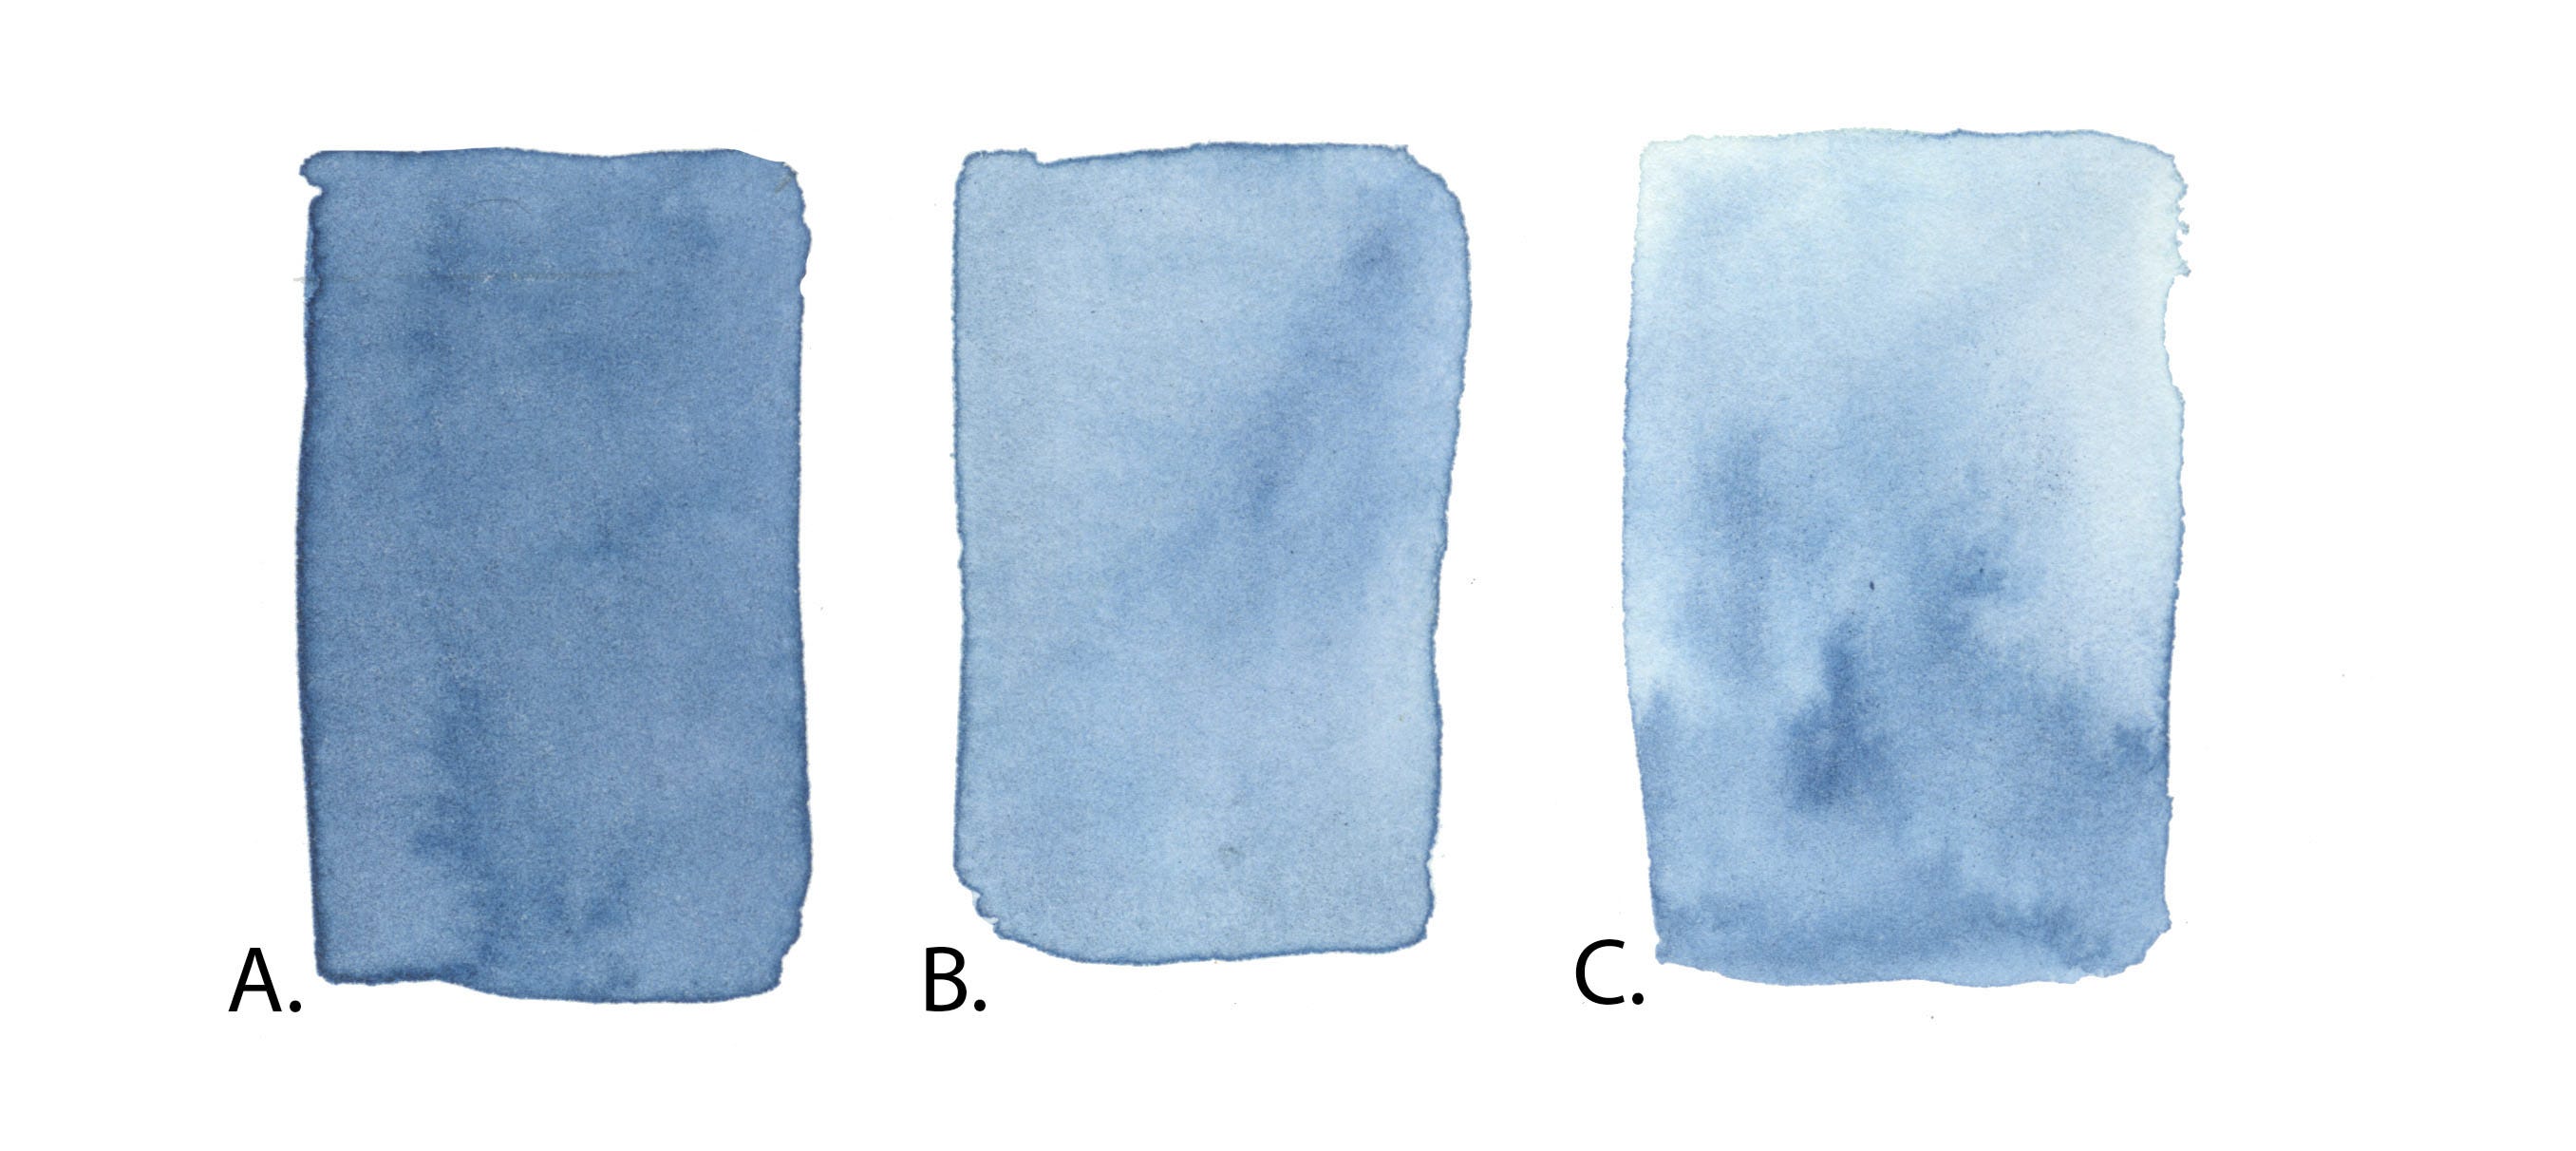
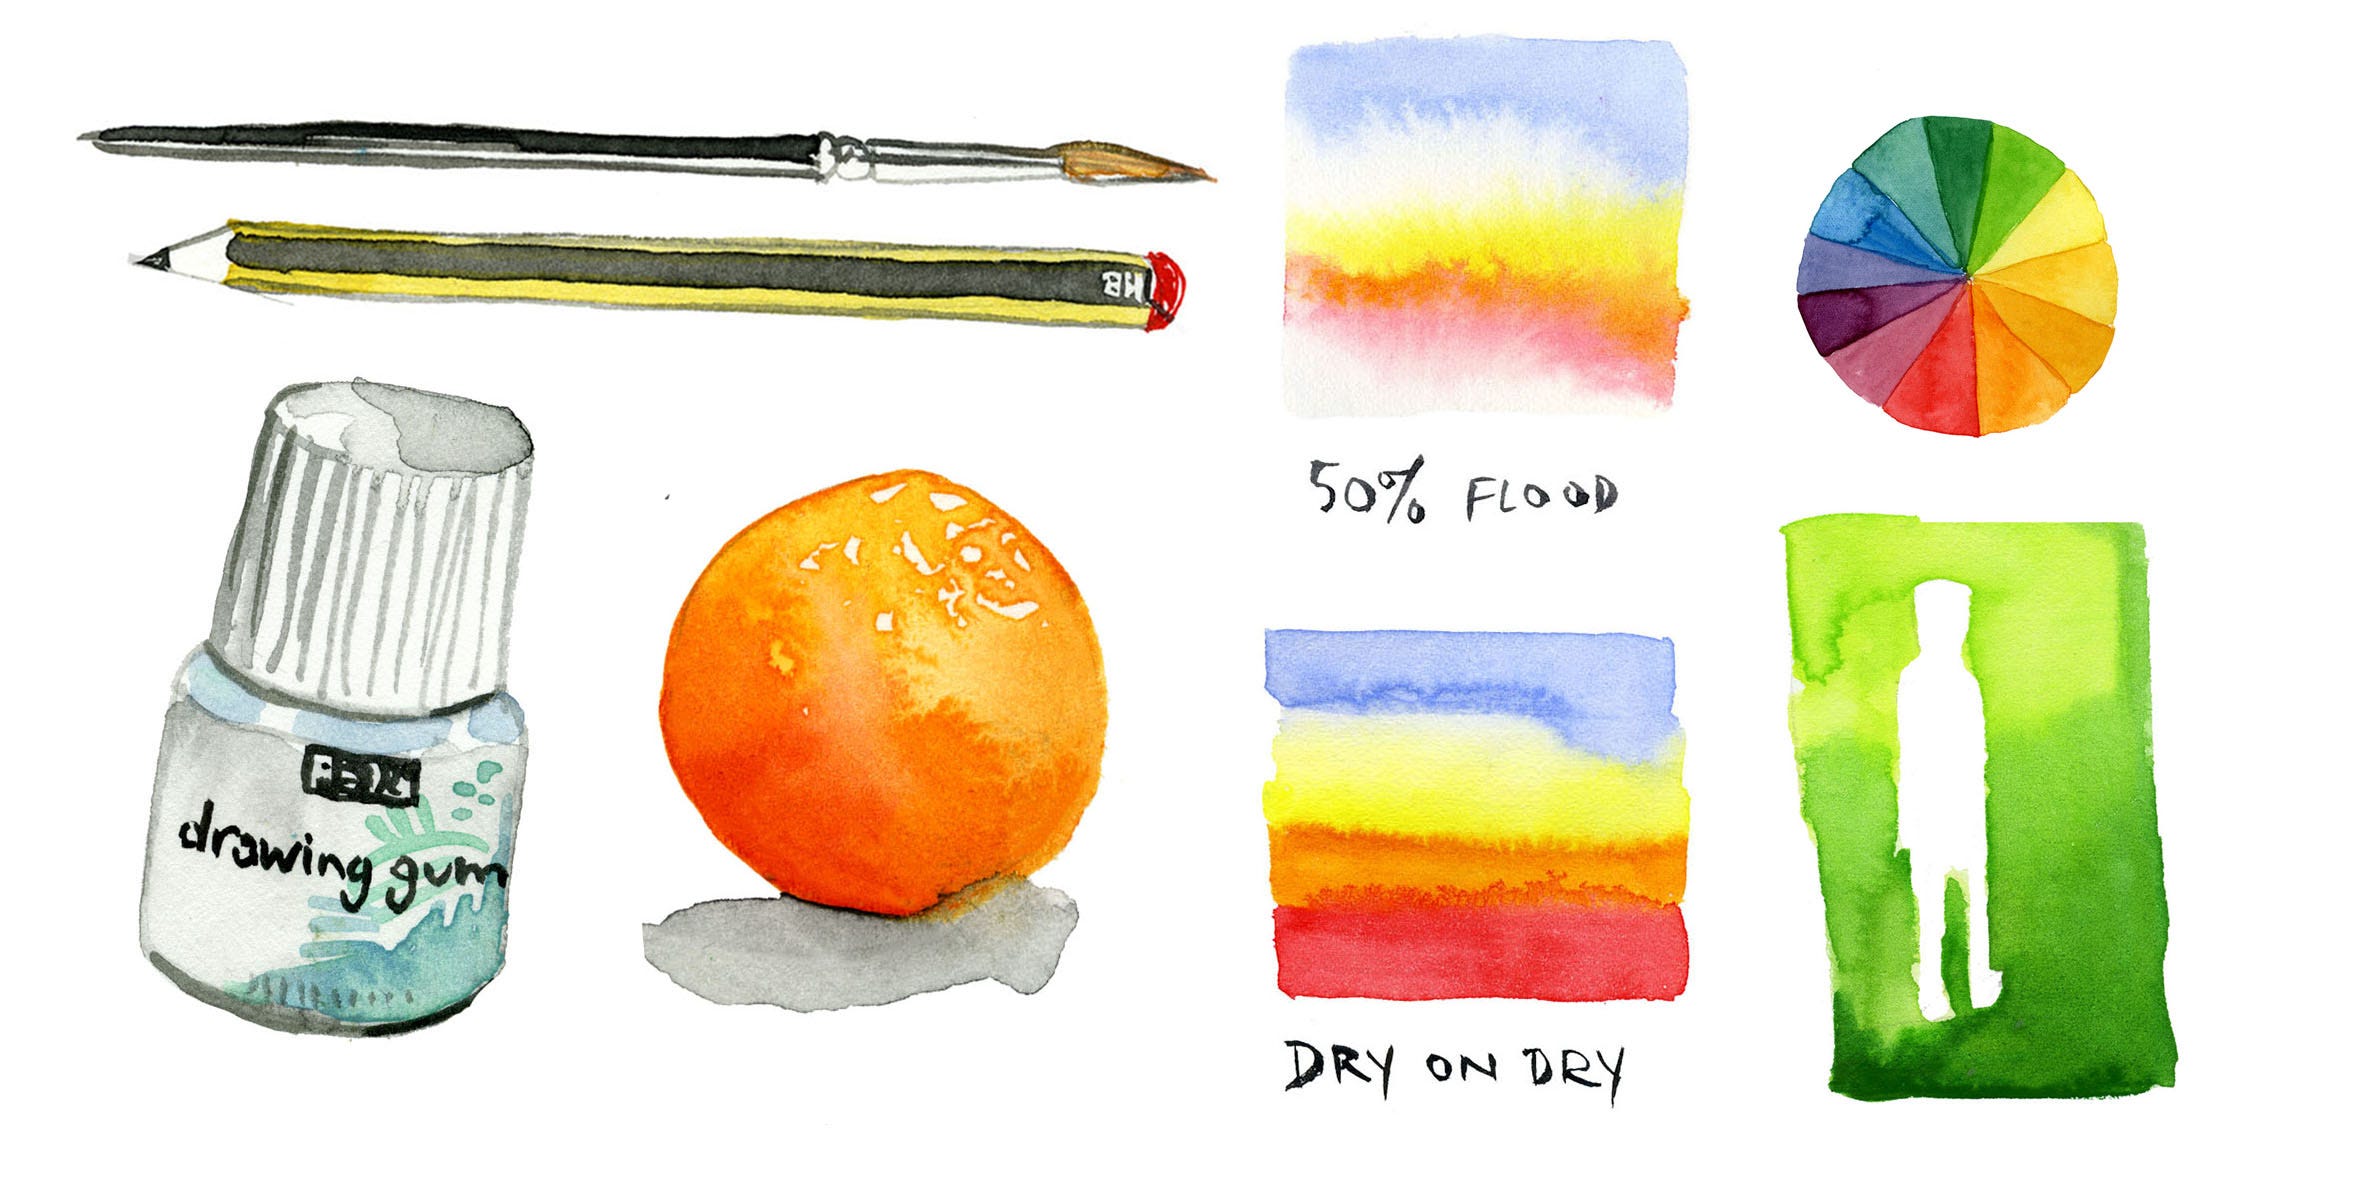
A. Dry-on-dry. This is when you apply just enough water to your watercolors and you paint a wash (or transparent layer of paint) directly on your paper. This technique is the most comparable to other forms of painting because you will globally know what you’ll get when your paint hits the paper. You are completely in control.
B. Dry-on-wet is what I like to call 50% flood. Dip your paintbrush in water and dab off on a paper towel. Paint the surface of the paper with the wet paintbrush until it is lightly damp. It should reflect the light but isn’t dripping wet. Now load up your paintbrush with the color of your choice and paint on the wet paper. You will see the water pull the pigment into a feathered effect and diffuse on the paper. To suggest volume, I like using dry-on-wet.
C. Wet-on-wet. Dip your paintbrush in your paint until it’s completely wet and get the surface of your paper as wet as possible. Then apply your color. You will see that you must submit to the ways of the water as it will take the pigment on a proverbial walk. As the water dries, it will continue moving the pigment around until it is completely dry. This is the technique that loses most potential watercolorists because of how haphazard it can be. To be honest, I rarely use it, only when I am doing more abstract work or if I am painting a sky.
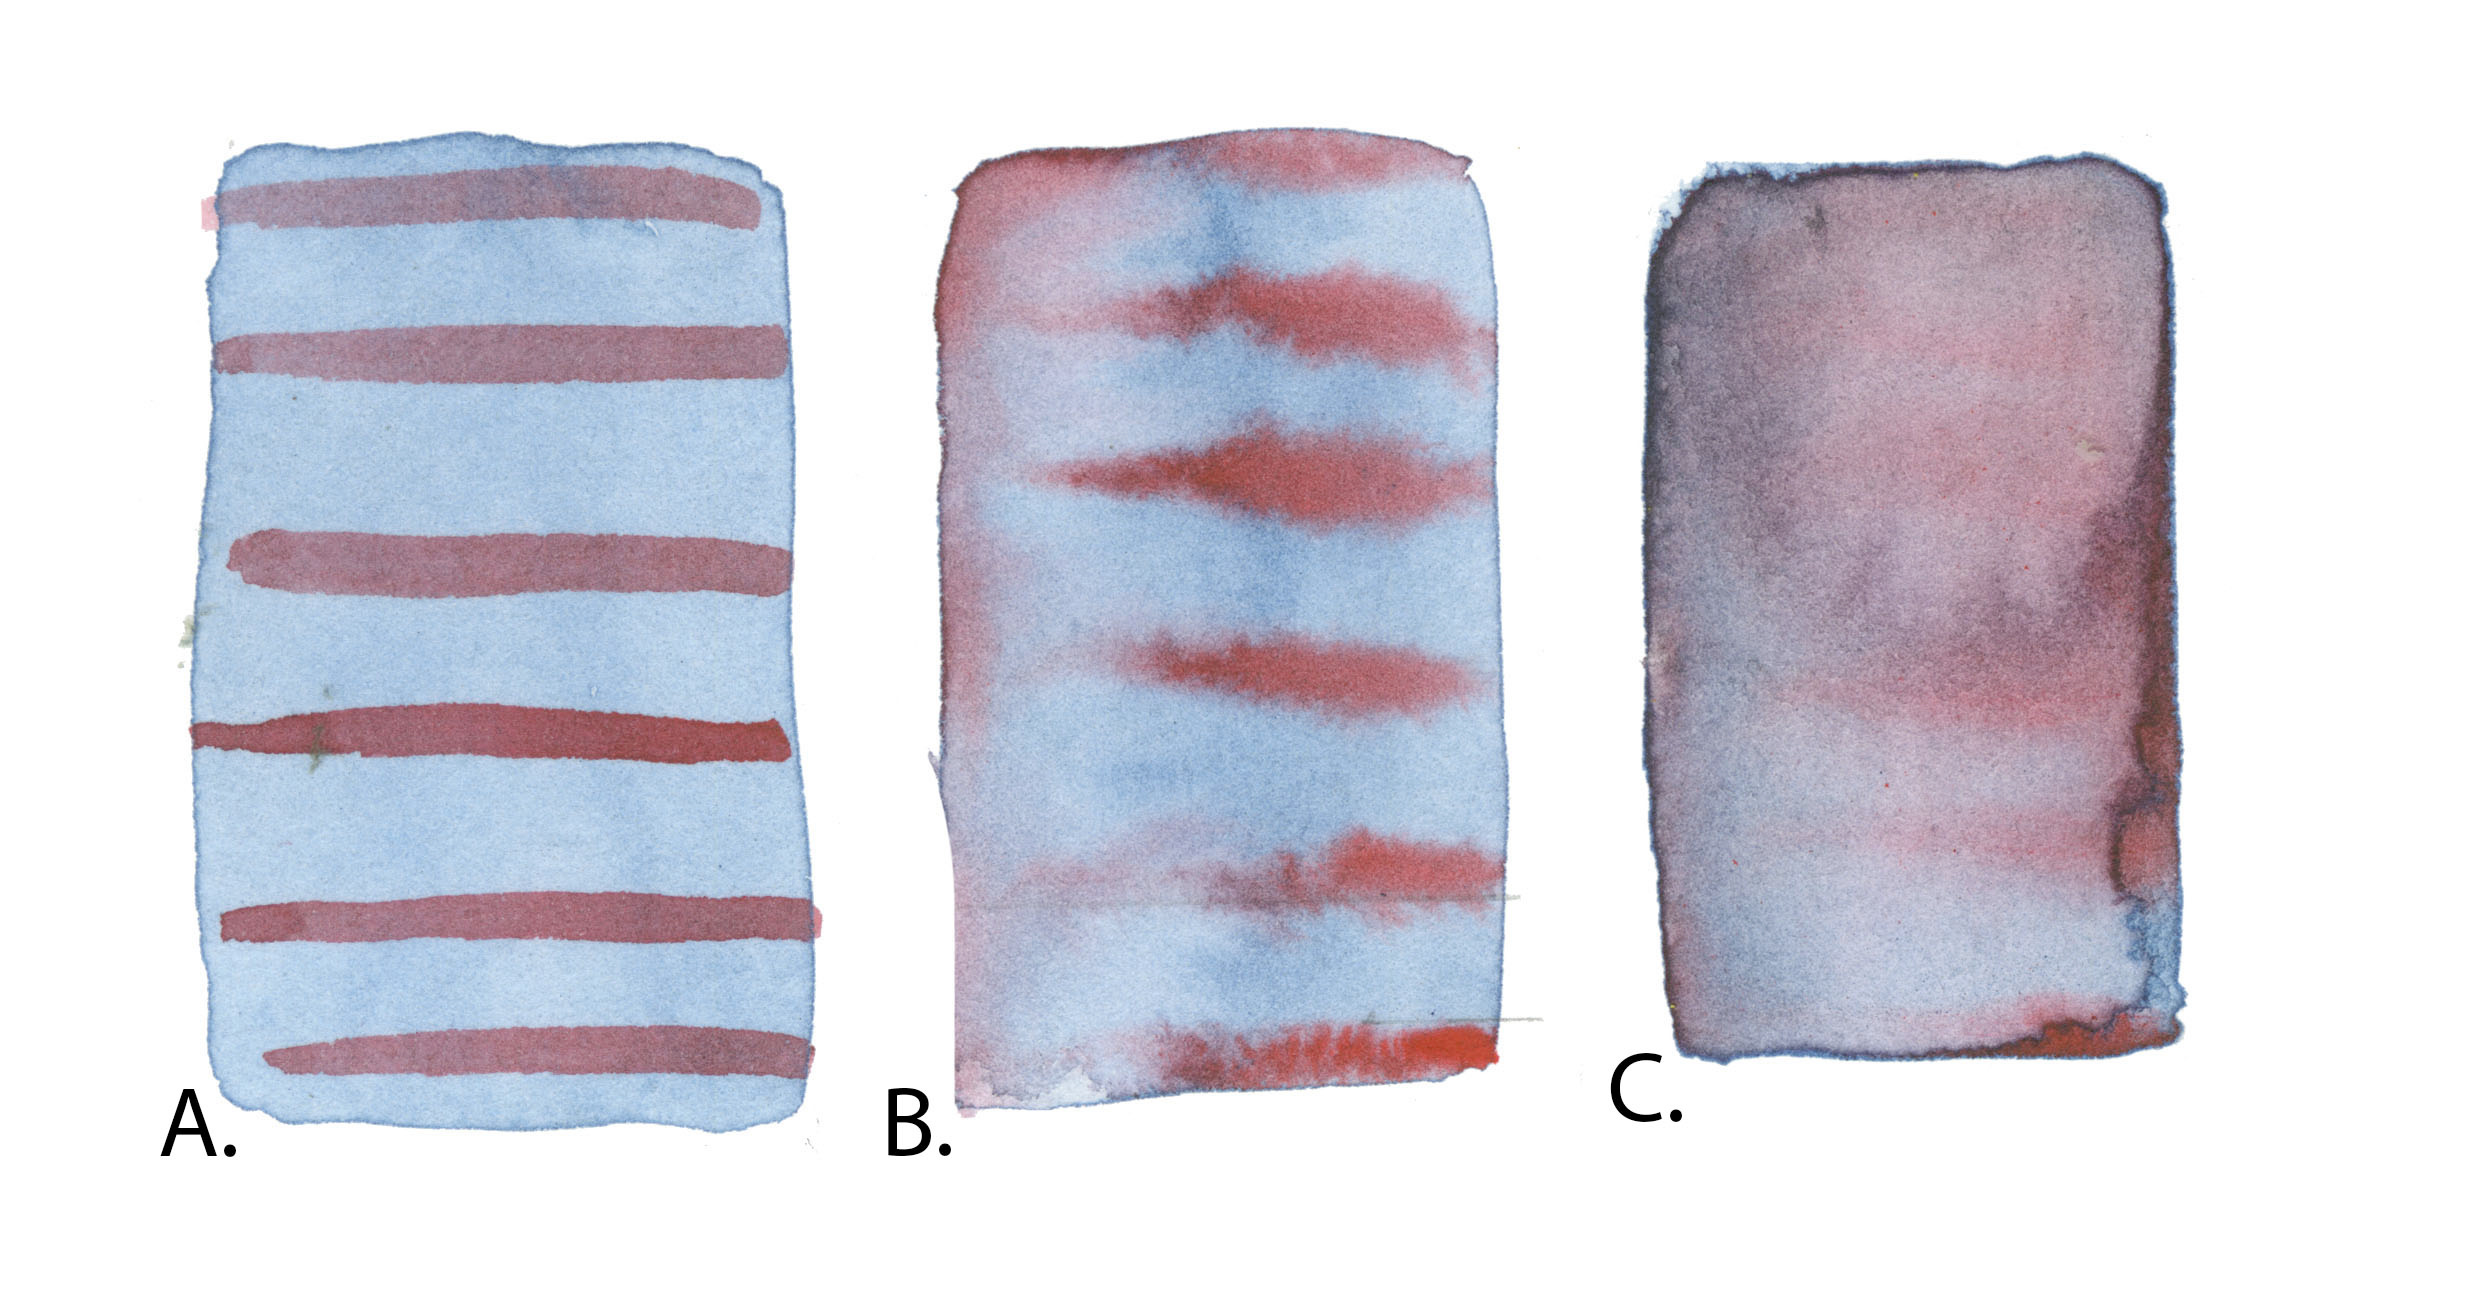
If you can’t quite see how the color moves on the page, take a look at how a striped texture applied with the three techniques diffuses differently on the paper.
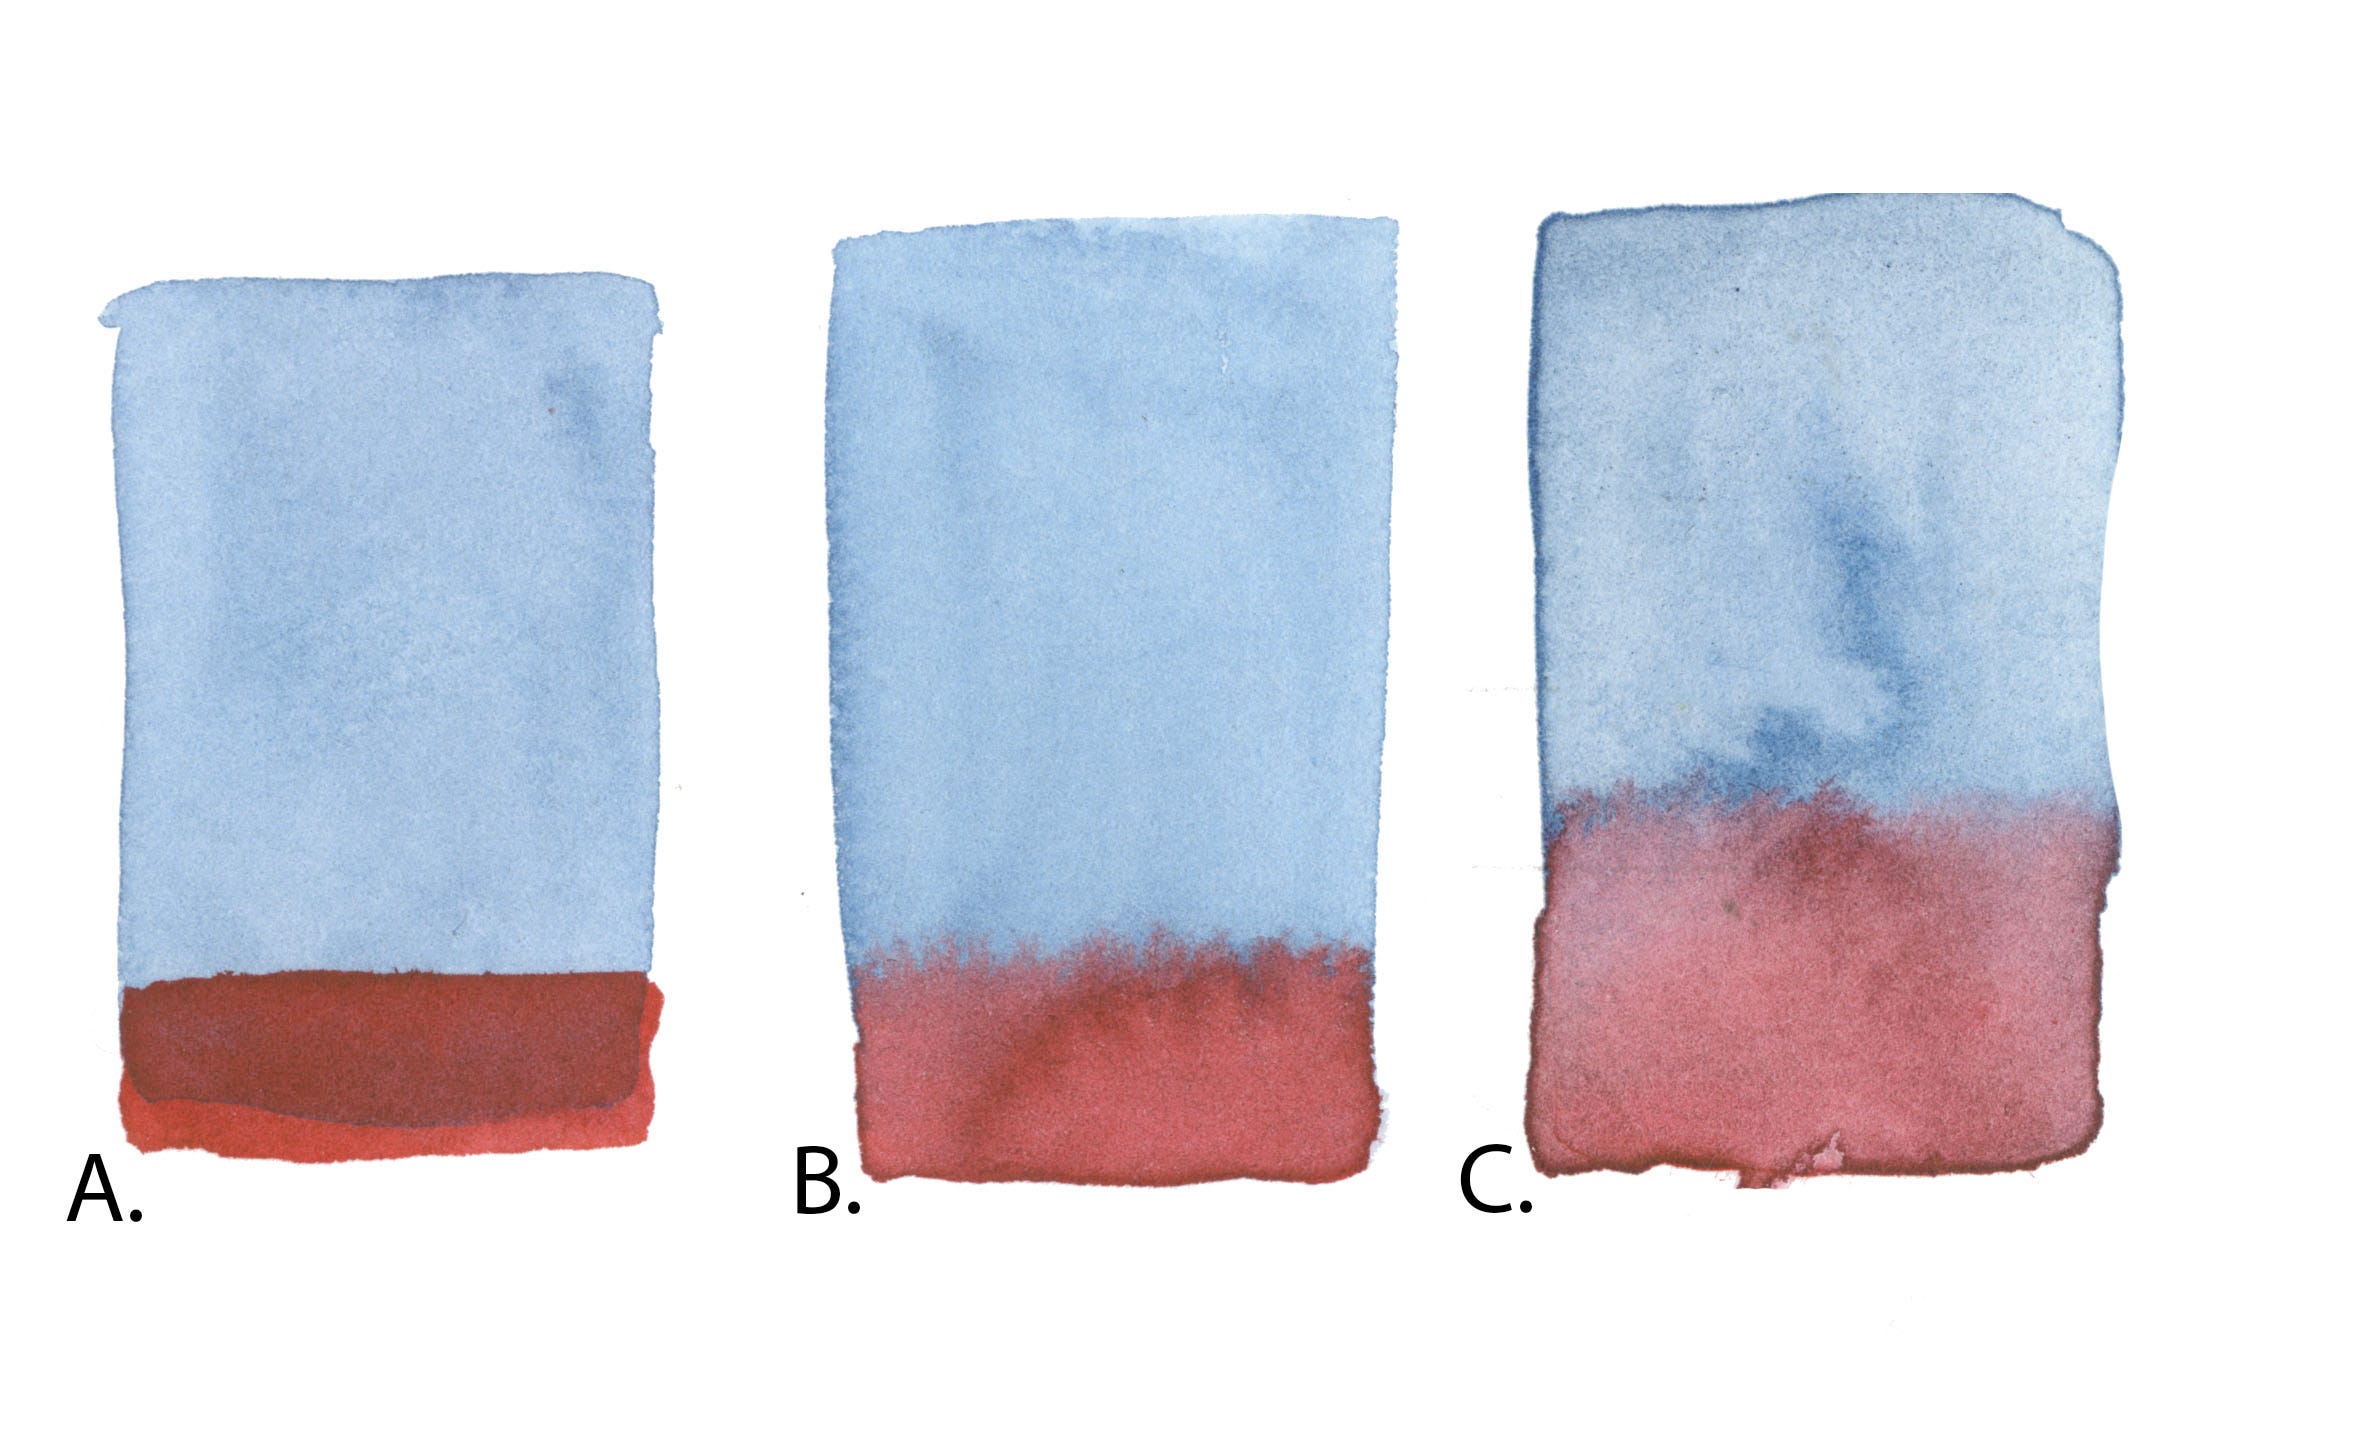
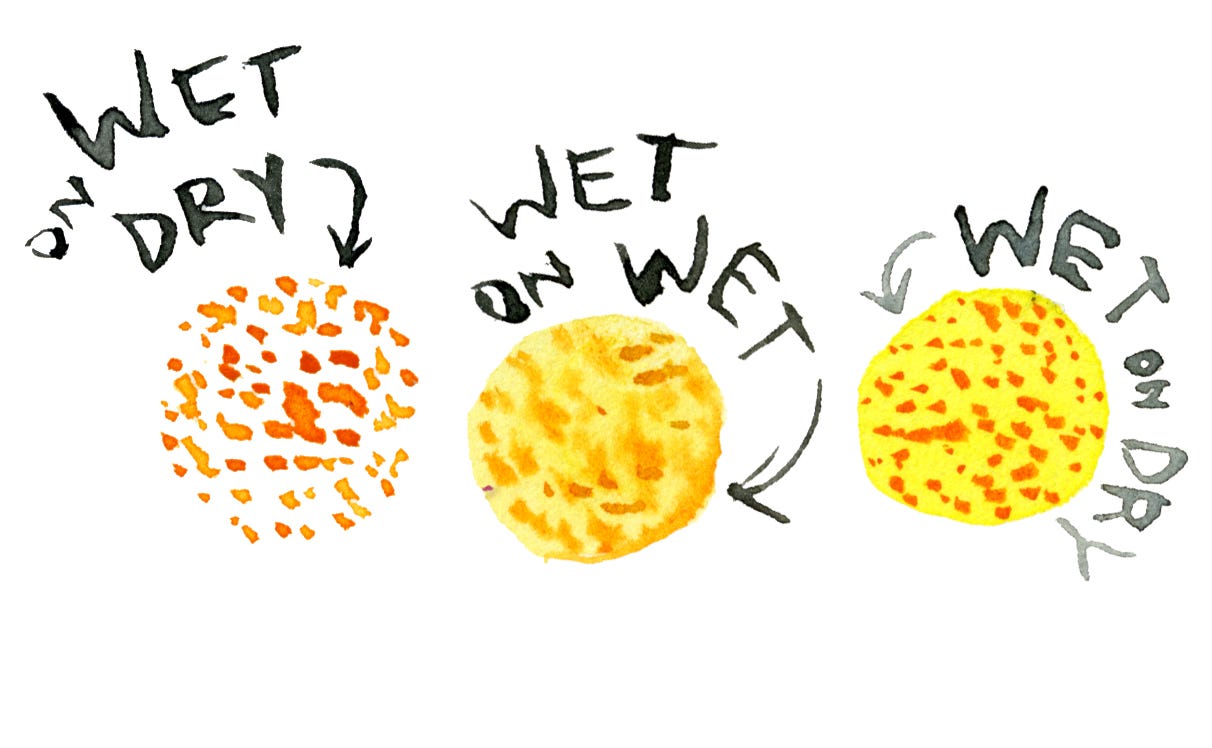
Color dropping is when the surface area is wet and you build another color on top. I applied the same amount of pigment at bottom of each rectangle using the three techniques and you’ll see the different tout suite.
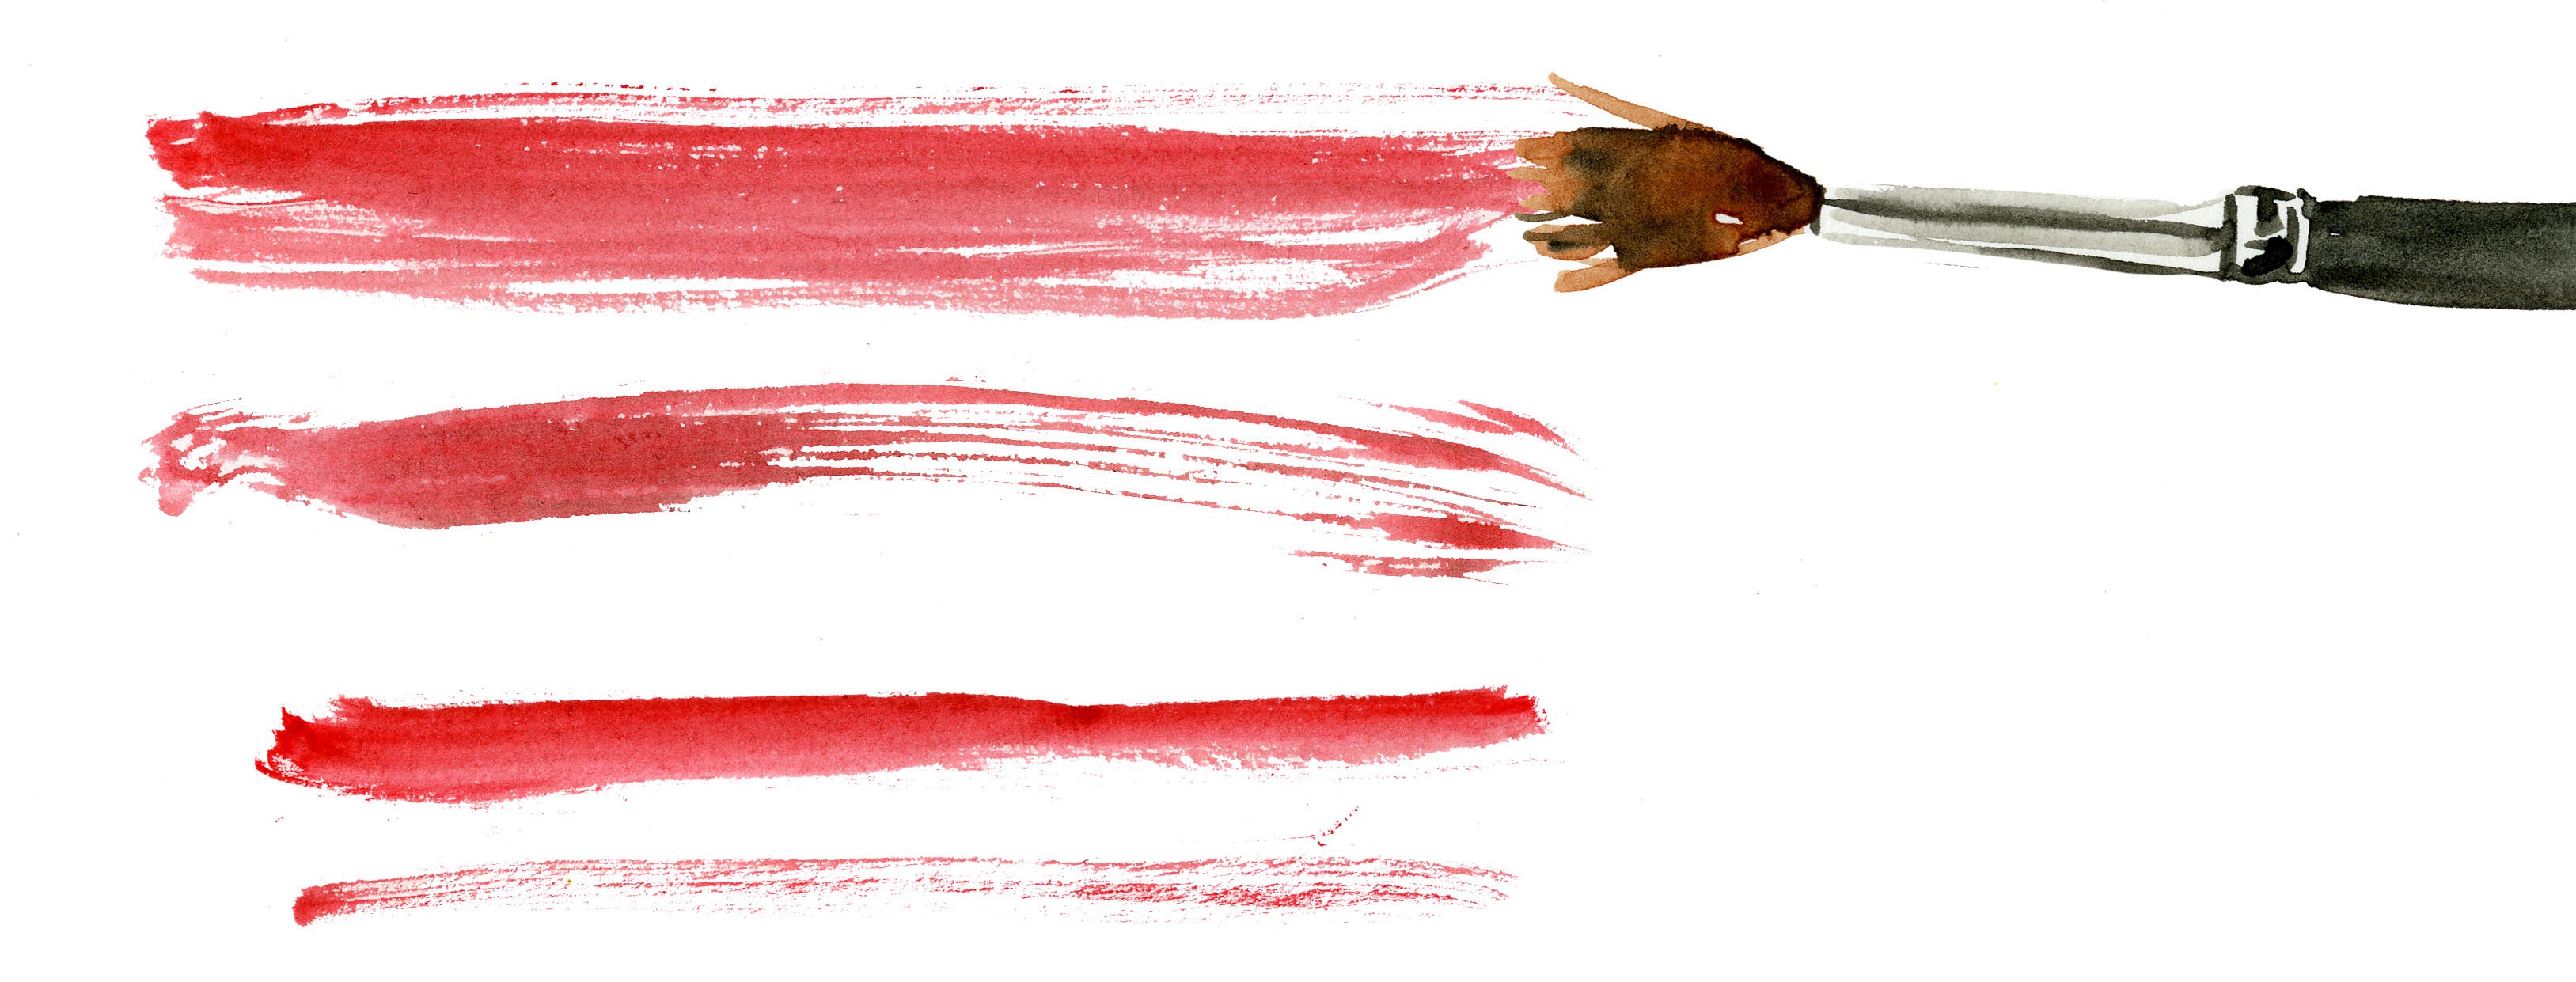
Dry brush. This is when you put the minimum amount of paint on your paintbrush and it just barely covers the bristles. When you apply it to the paper, it has a scratchy effect. What is this good for? This is good for creating texture on tree trunks or to render hair. If you don’t want the scratchy effect, use a larger brush and be sure to add more water to your paint to get it flowing.
Layering techniques.
I have to mention that you can layer techniques, too. You can see three very different effects above.
Which one do I use?
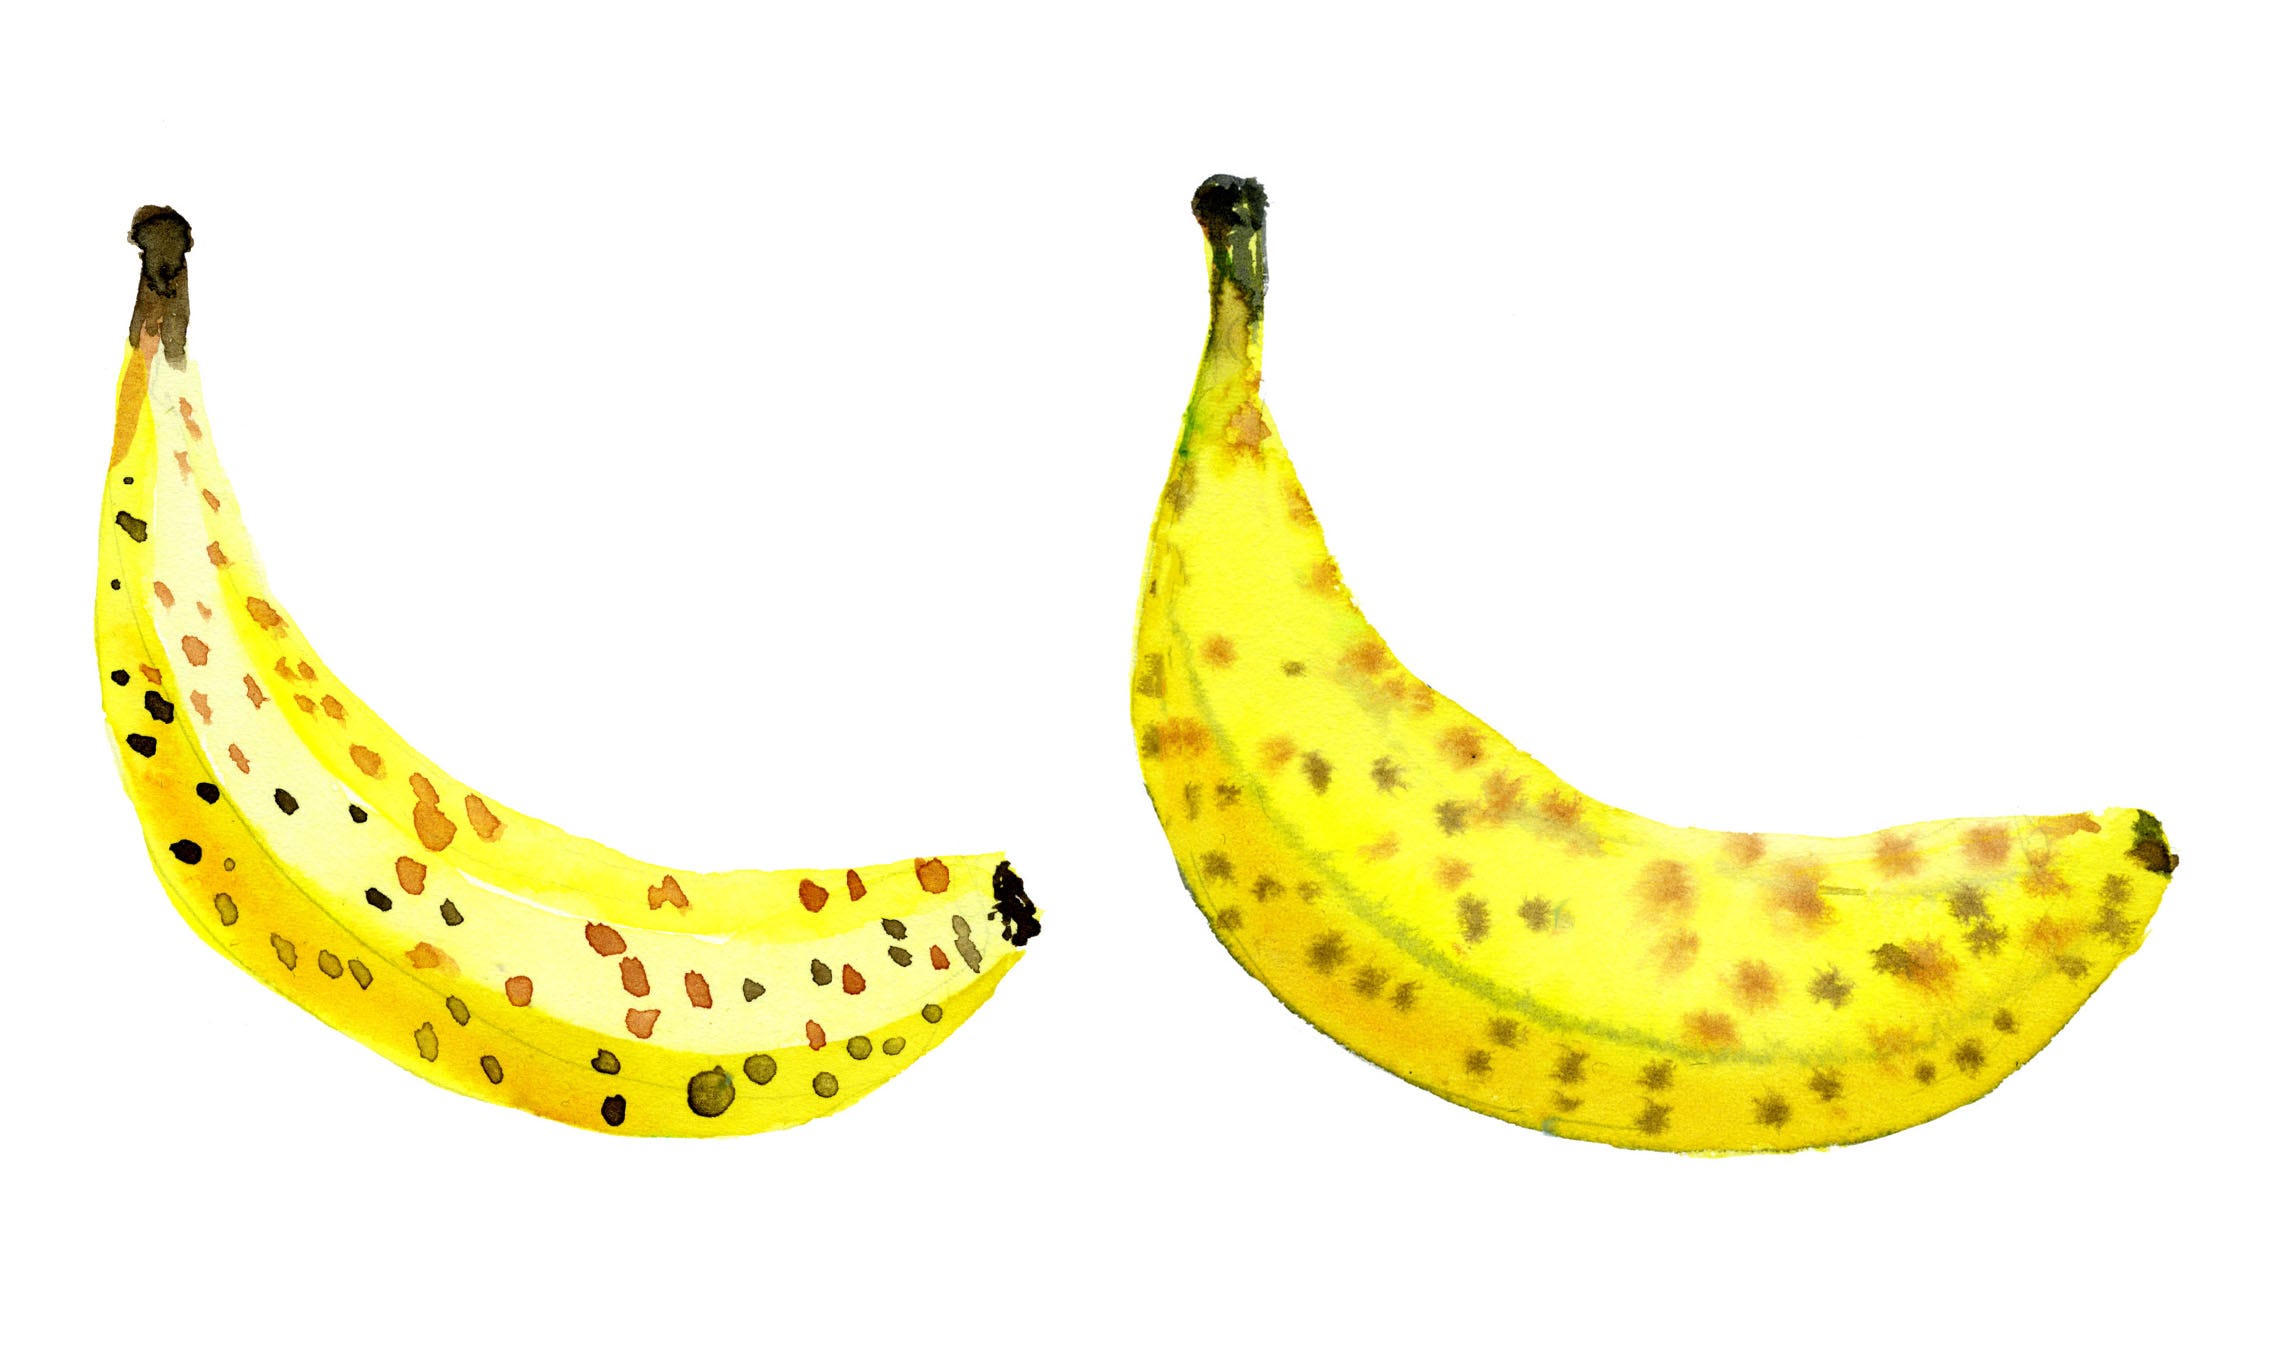
Once you know the techniques, then you can adapt them to your needs. You will see below, I painted the same banana with two different techniques. At first glance, they both look like a banana. Dry-on-dry is more controlled while dry-on-wet is more subtle. Which one is better? Intro sticky grey area where art becomes completely subjective….
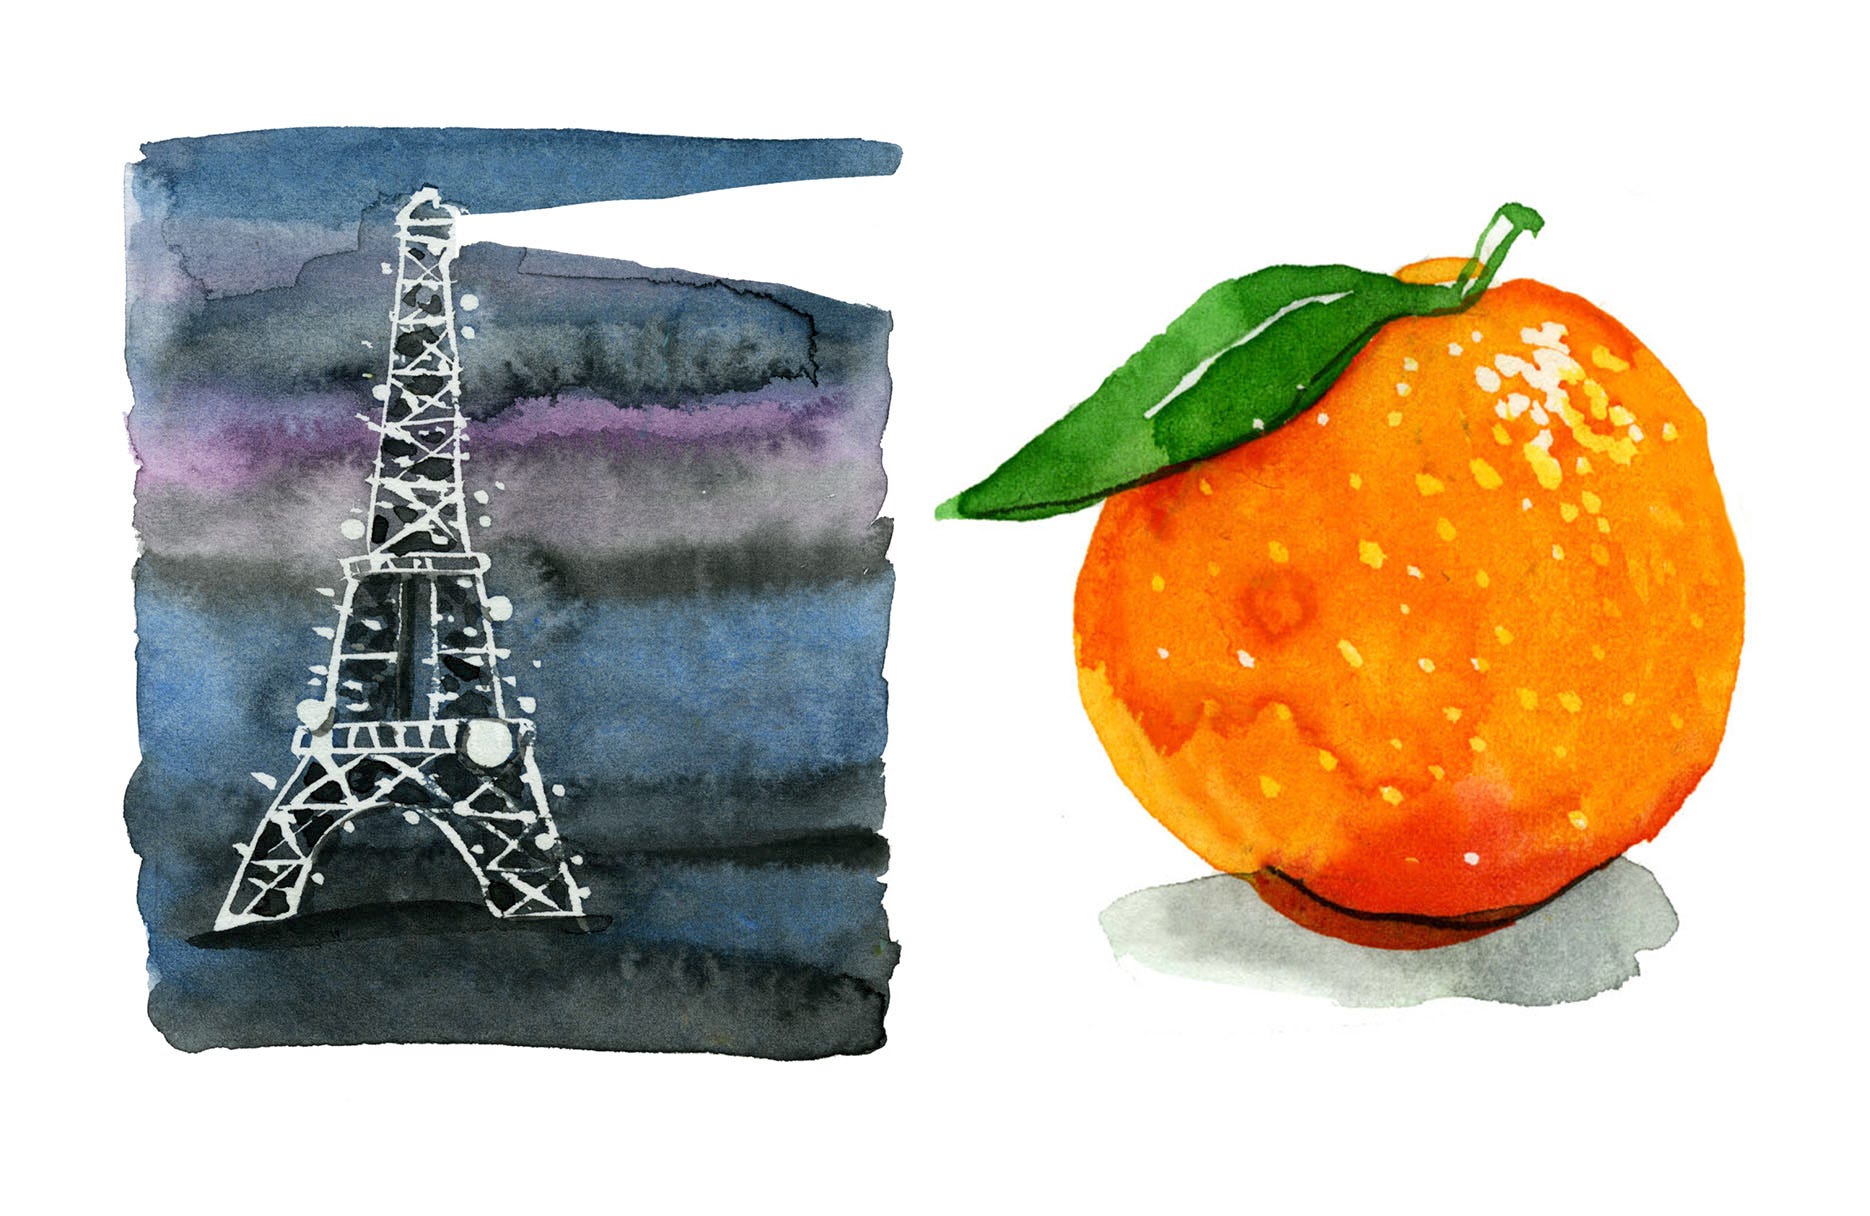
Drawing gum is a liquid latex masking fluid. It can be painted to the surface of your paper to block out desired areas of your paper. When watercolor is painted on top, it deflects the pigment. Let me remind you that white is the most important color in watercolor. And that is not the white watercolor in the set, it’s the white of the paper you are using. Back to drawing gum, when the painting is completely dry, you can rub it off vigorously with a finger tip and you will see the pristine white saved underneath. In the Eiffel Tower above, I painted it in its sparkled state with drawing gum, let it dry completely, then painted on top in black, blue and purple. In the orange above, I painted on a few pores on the zest with drawing gum before painting to save the white space. But you can also map out your white spaces with a pencil ahead of painting.
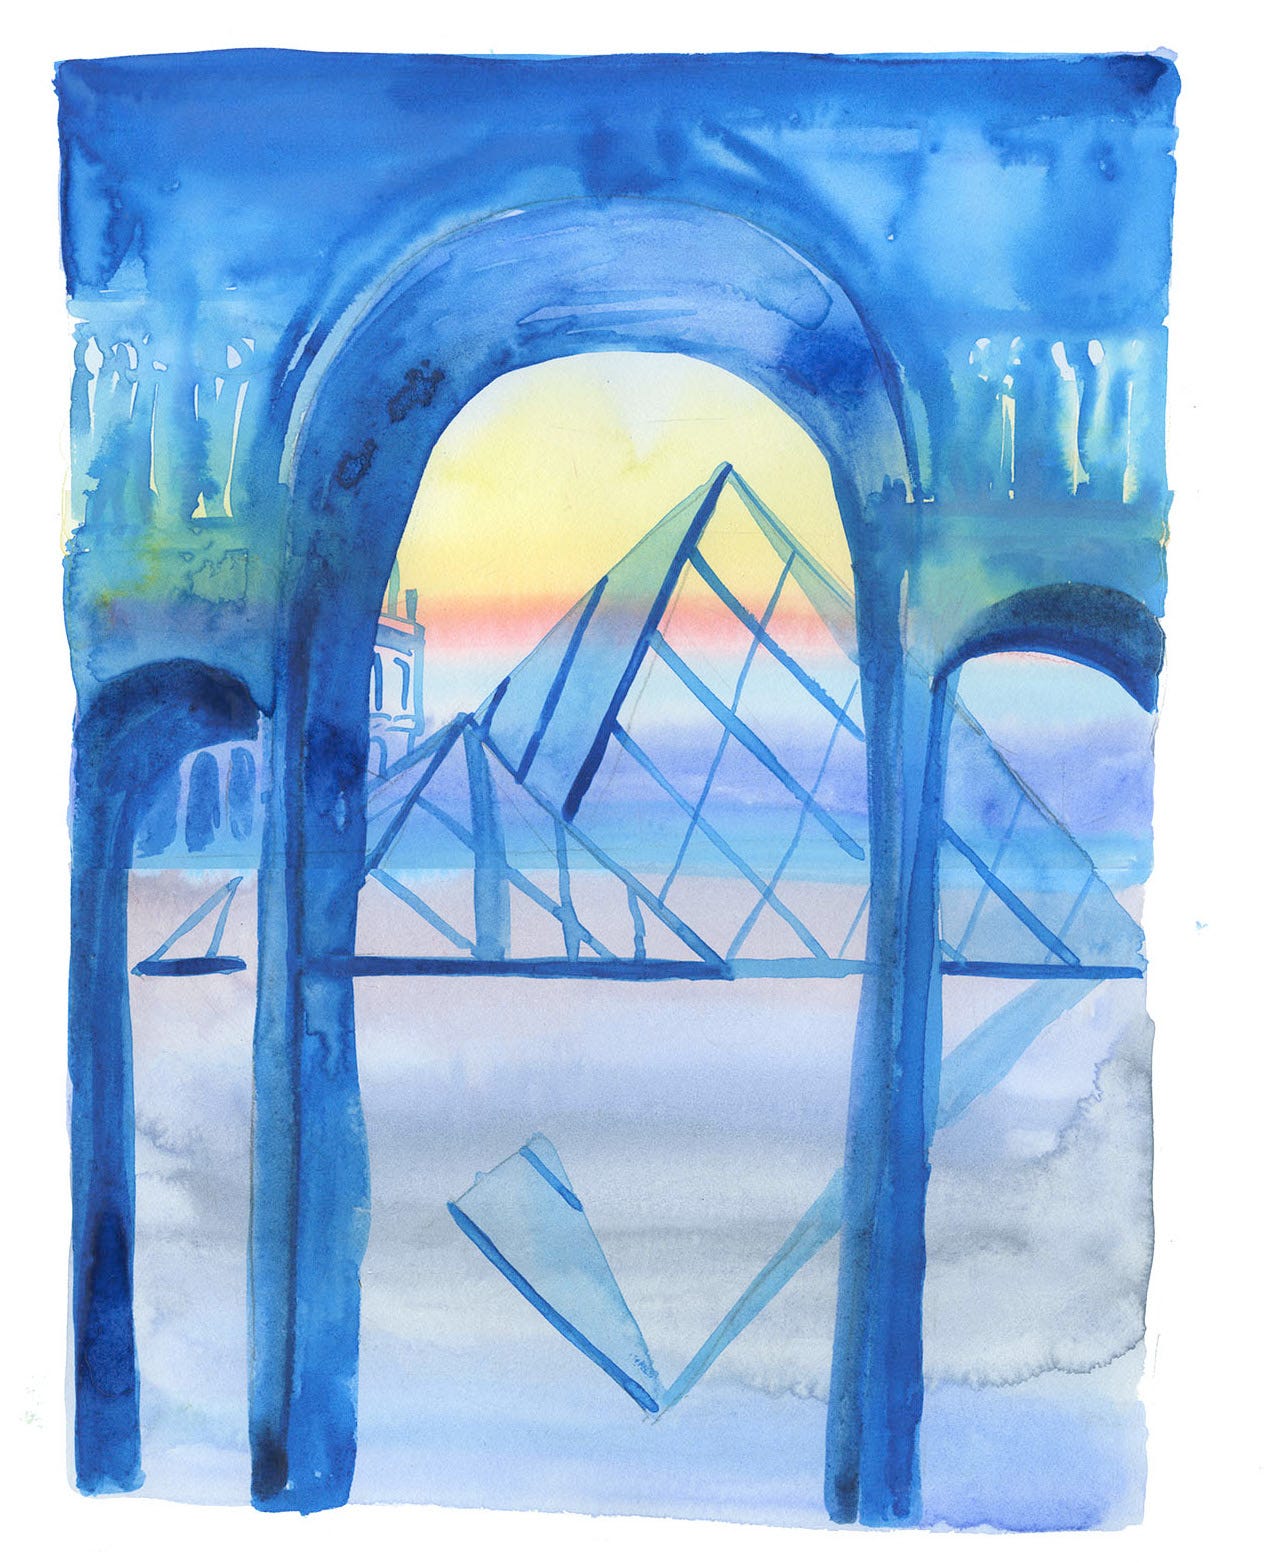
Let’s get pragmatic. Note the view of the Louvre’s two pyramids above. The first layer I painted was the sunset background using dry-on-wet. I lightly dampened the surface area of the top half of the paper. While the paper was still damp, I confidently painted horizontal stripes of color one by one. Once that layer was dry, I added a blue/purple wash on the bottom half. I mixed a darker, more saturated blue and started building the structure of the pyramids. I wanted the arch way to have a similar washy watercolor style. I lightly dampened the surface area and started layering the blue paint. Once that layer was completely dry, I went back and added the shadow of the arches using the dry-on-dry technique to build a darker color.
Assignment. Take out your supplies. Sketch out a few rectangles on a sheet of watercolor paper and try out the different techniques for yourself. Do you have a preference? Do you prefer the total control of the dry-on-dry or the dreamy effect of wet-on-wet? Now try painting something from life. Ask yourself which techniques are best for what you want to render. If it doesn’t work, I give you permission to either scrap it or accept that you are learning something new.
Was this helpful? Please share with a budding watercolorist.
Stay inspired, dear reader. And don’t drink the watercolor water. -jkw