


Yesterday I finally got to chat with Erin Gleeson, longtime Instagram friend and author of The Forest Feast universe. We both just published watercolor books this spring and have been hyping each other up for months behind the scenes. We’re both watercolor fanatics and loyal to Kuretake watercolors (fun fact: I influenced Erin to buy them initially many years ago). Her most recent book is dedicated to painting fruits and vegetables, The Watercolor Feast. Definitely check it out at your favorite local bookstore.
Exchanging many tips and watercolor philosophies, here’s how I walked Erin through the process of painting an apple. Enjoy!
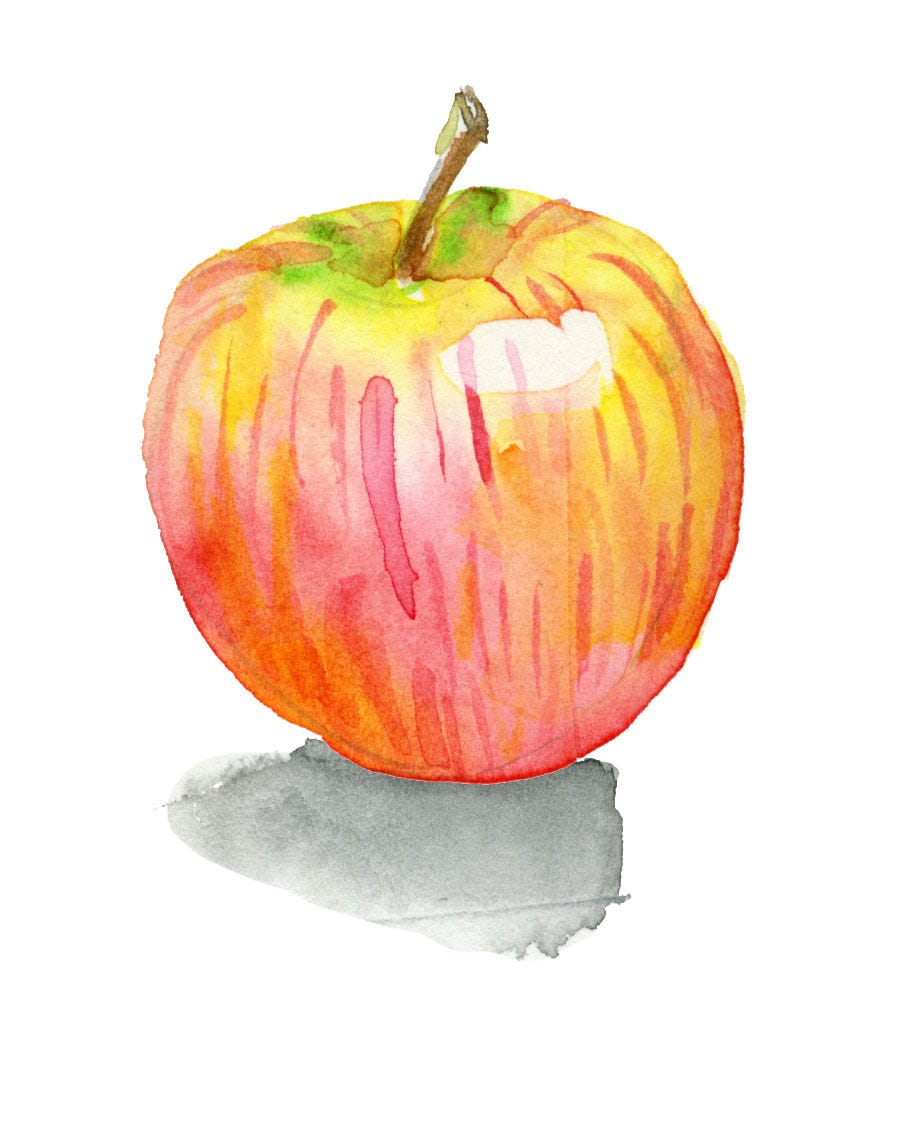
Paint me an apple! Inspired by Day 2 of my new book Thinking in Watercolor
This exercise maps out how to analyze your subject matter, the humble apple, and break it down into actionable watercolor steps. There’s a reason why the master painters and art schools rely on still lives. Everyday objects don’t move or change and you don’t need to bribe anyone to pose for you. You may be tempted to work from a photo, but work from life because it requires a greater engagement while you’re painting and takes off some of the pressure of being photo realistic.
Step 1 / Inspiration
Find a fruit or vegetable and set it on a table in a room with natural light.
Study it for a 2-3 minutes. Where is the light source coming from? I see a reflection on the right so I know there’s where the light is coming from. Describe the texture. Where are the highlights and lowlights? Is it high or low contrast? Where will you save the white space if needed? What colors do you see?
Step 2 / Strategize
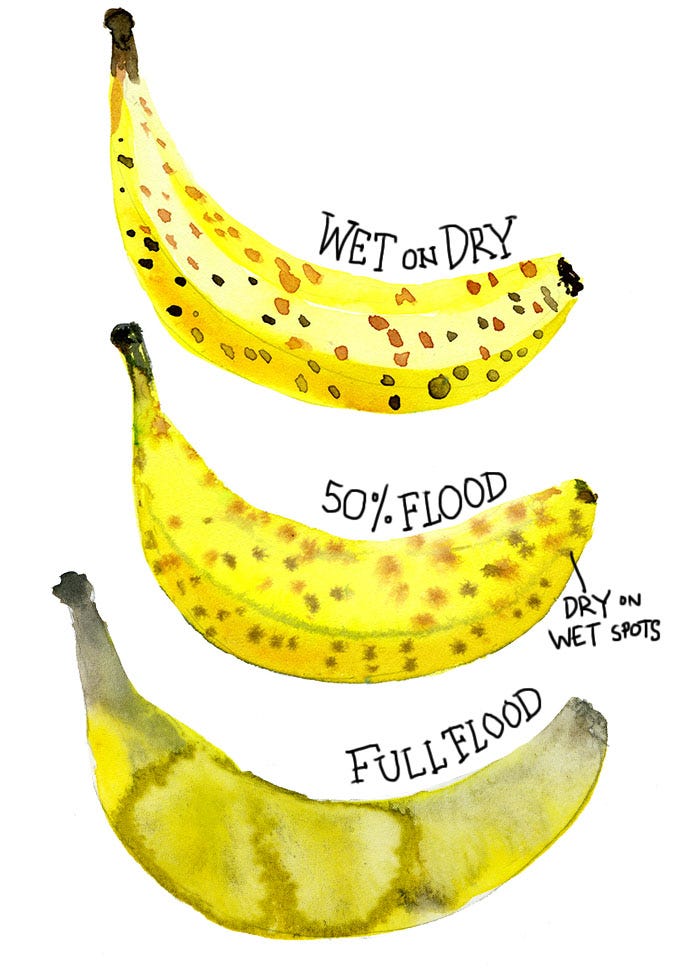
Which watercolor technique will be the best match for the texture of the fruit or vegetable? Nothing happens by chance in art making. Illustrated above is a trio of bananas painted with 3 different watercolor techniques. Which one looks most like a banana? It’s up for interpretation, but I think the 50% flood version wins for me. Because I want to build volume and texture, I’m going to attack the apple with 50% flood. Sketch out the apple with a 6H pencil, outlining the white space of the highlight because I need to make a mental note not to paint this area.
Step 3 / Paint
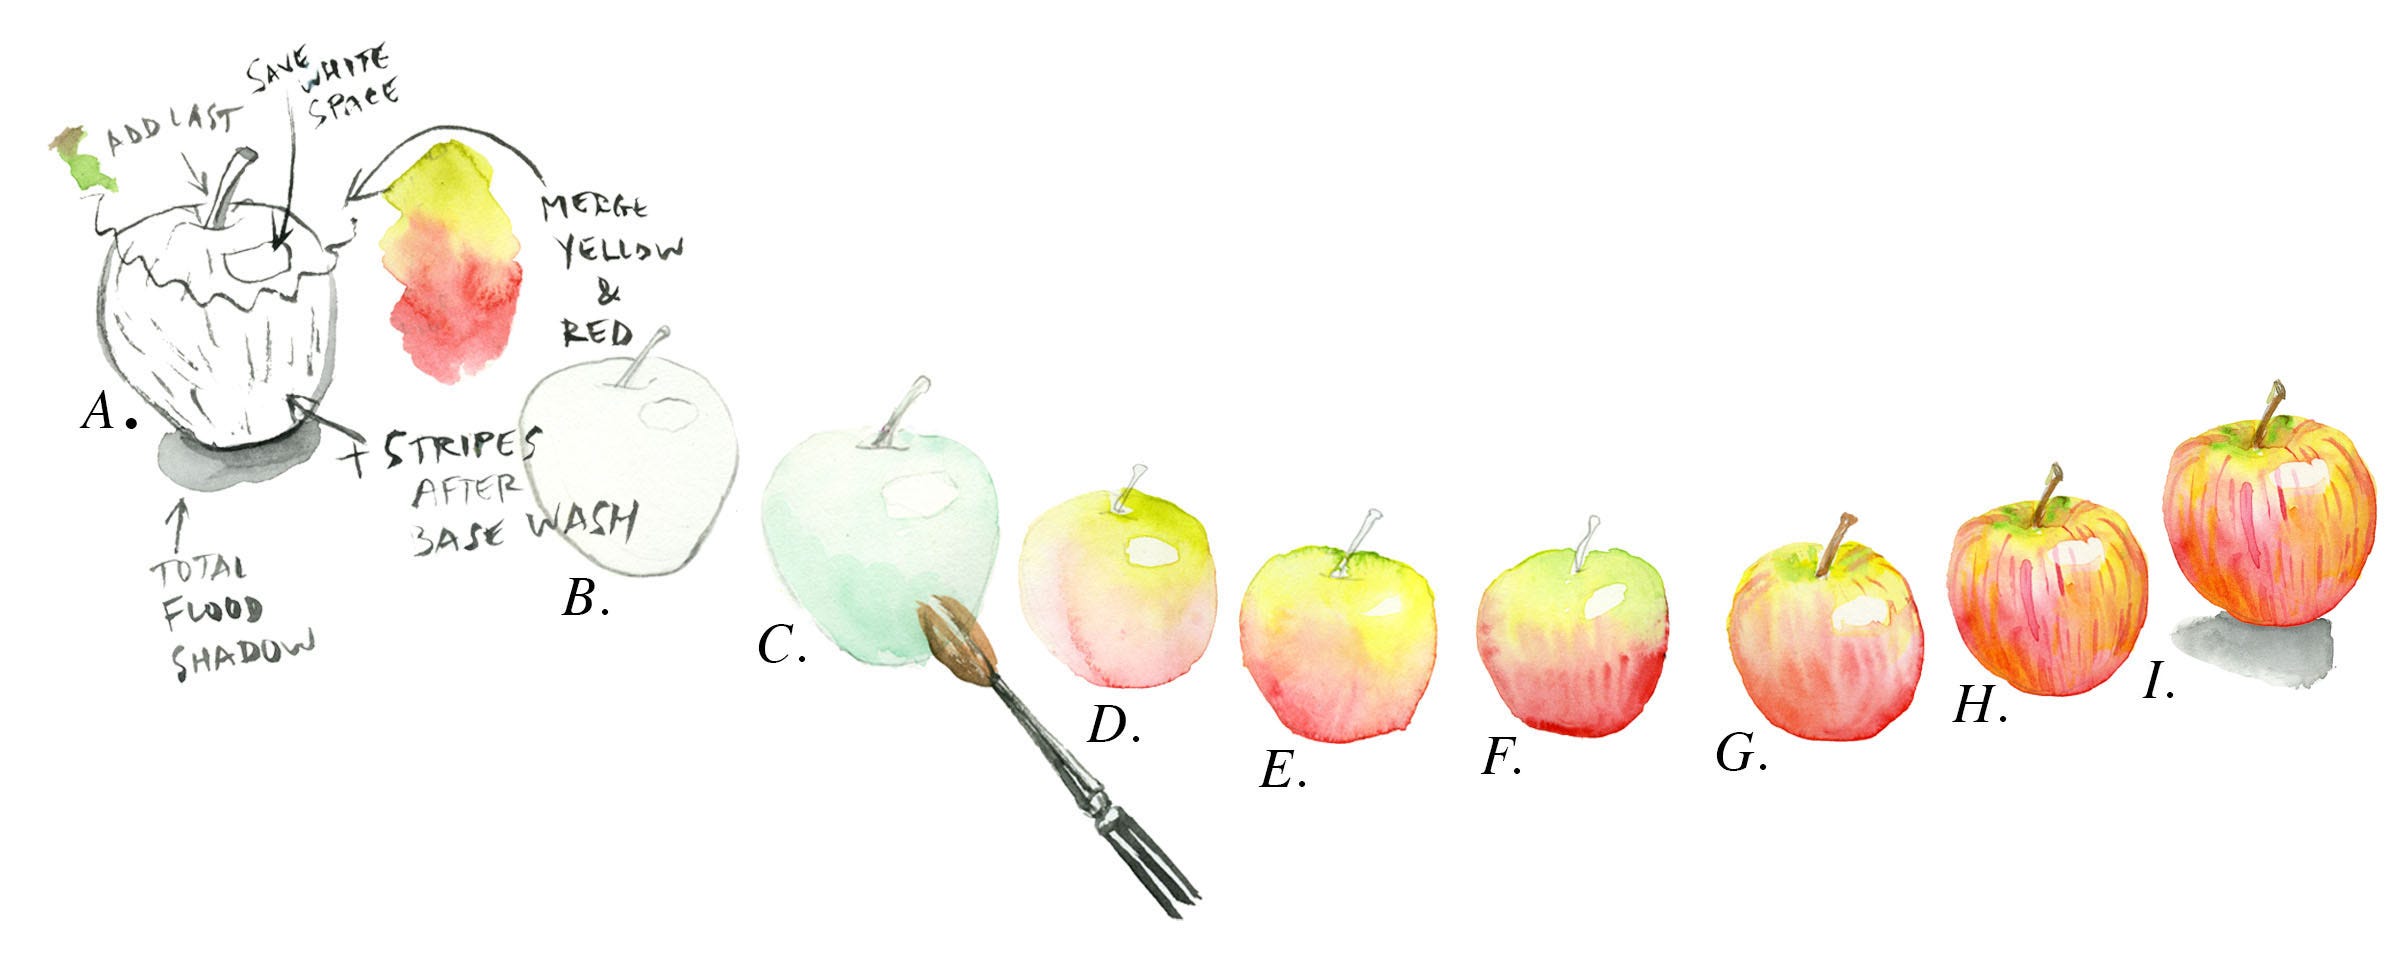
In step C. I paint the surface area of the apple with a wet paintbrush until it’s damp, but not dripping all over the place. Notice how I don’t paint the highlight in the upper-right hand corner. In D while the layer is still wet, I paint pink on the bottom and yellow-green on the top, noticing how the wet paper helps them to diffuse into one another. I reinforce the color in step E, building texture by layering lines in F and G and also add details to render the stem. Once it’s completely dry, I go back with some more defined stripes wet-on-dry in H. And because this apple isn’t flying in space, I paint a shadow in I to ground it.
How did I do? You may have an idea of what you think an apple looks like, but having the primary reference, or apple, in front of you is key to capturing the visual information. Look intensely and it will pay off.
Take care, dear reader. And don’t drink the watercolor water. -jkw
For many more tips & tricks, purchase my new book Thinking in Watercolor. And it deserves the friendly companion The Watercolor Feast.
Wanna learn watercolor with me in Paris? There are a few spots left in my Paris Watercolor Retreat, November 10-14.
Please consider sharing with a friend.


Share this post